
 28 Sep 2026
  12 min read

 Danny Wall

If you’re working out how to build a pergola without cutting every joint yourself, a pergola kit takes most of the measuring and notching off your hands. With two people and basic tools, a 3m x 3m timber pergola kit can go from delivery to a standing frame in around a day, plus setting time for the postcrete.
This guide covers kit contents, planning rules, building on different surfaces and each stage of the build, followed by the mistakes to avoid and how to look after the timber.
Building a Pergola from a Kit or Sourcing Your Own Timber
Building a pergola from loose timber means cutting every notch, bevel and brace accurately by hand. A pergola kit arrives with the main joints already cut, so most of the work is digging, levelling and fixing.
|
Pergola kit |
Sourcing your own timber |
|
|
Joints and cutting |
Posts pre-notched and rafters bevel cut |
All cut by hand |
| Fixings |
Screws and postcrete supplied |
Bought separately |
| Build time |
Around a day for two people, plus setting time |
Longer, as marking and cutting add time |
| Skill needed |
Basic DIY |
Confident with a saw and square |
|
Size and design |
Set sizes, usually square |
Any size, including lean-to and wall-mounted |
Loose timber still makes sense for odd sizes or a pergola fixed to a wall. For a freestanding square pergola, a kit saves time and removes the most common cutting errors.
What Comes in a Pergola Kit
Contents vary between suppliers, so read the parts list before ordering. The heavy duty pergola kits at Skuma Timba use FSC® certified pressure treated softwood and stand under 2.5m high. A 3.0m x 3.0m kit includes the following.
|
Part |
Quantity |
What it does |
|
150 x 150mm notched sawn posts |
4 |
Uprights with notches cut to take the beams |
|
47 x 150mm x 3.6m rafters and beams, bevel cut |
10 |
Beams sit in the notches and rafters run across them |
|
47 x 75mm x 2.4m infill |
4 |
Holds rafter spacing and stops twisting |
| 47 x 150mm x 3m brace length | 1 |
Cut into knee braces for the corners |
|
Postcrete |
8 bags |
Two bags per post |
| 200mm and 100mm timber screws, 100mm timber drive screws | 3 packs |
Fixings for each joint |
| Assembly guide | 1 |
Post spacing, build order and fixing details |
The 2.4m kit has eight 3m rafters and beams with three infill pieces. The 3.6m kit has twelve 3.6m lengths with five infill pieces.
Extra Items You’ll Need Alongside the Kit
- Gravel for the base of each post hole
- End grain preservative for any cuts
- Scrap timber and clamps for temporary bracing
- Bolt-down post shoes and masonry concrete screws for a concrete base
- Wood stain or paint if you want to change the colour
Before You Start Building
Choosing Where Your Pergola Goes
An open rafter roof only gives light shade, so the position you pick decides how much sun you get underneath. Before settling on a spot, check the following:
- Drainage: wet ground around post bases speeds up decay, so avoid low spots where water sits
- Access: 3.6m lengths need a clear route into the back garden, so measure side gates first
- Underground services: cables, pipes and drains can run closer to the surface than you’d expect
- Boundaries: distance from the boundary decides how tall the pergola can be without planning permission
Check Whether You Need Planning Permission For a Pergola
Most back garden pergolas in England count as permitted development and don’t need a planning application.There are some exceptions, to this, so it’s always best to double check before you start building anything:
- Height: no more than 2.5m if any part is within 2m of a boundary, or up to 3m for a flat-topped structure further away
- Measuring: height is taken from the highest ground next to the structure, so raised decking counts towards the limit
- Position: behind the front of the house and not on a raised platform over 0.3m high
- Coverage: all outbuildings together can’t cover more than half the land around the original house
- Property type: listed buildings and flats usually need permission
- Location: conservation areas, National Parks and National Landscapes have tighter rules, and Scotland and Wales follow their own, so check with your local council if you’re unsure
Check with your local planning authority or the Planning Portal before you start, as this is general guidance and shouldn’t be taken as planning advice.
Building on Soil, Patio or Decking
| Surface | How the posts fix |
What to watch for |
|
Soil or lawn |
Set posts in postcrete, which is how most kits are designed to go in |
Clay can hold water, so add gravel at the base |
| Paving slabs |
Lift slabs and dig through, or use post shoes on a solid base |
Slabs bedded on sand won’t hold a fixing |
|
Concrete slab |
Bolt-down post shoes with masonry fixings |
Keep fixings back from the slab edge |
|
Decking |
Take posts through the deck into the ground |
Deck boards and joists alone won’t stop movement |
Using post shoes on a kit designed for the ground means cutting the below-ground section off each post, or the pergola will stand taller than designed. Measure down from each notch so all four posts end up the same length.
Tools Checklist
- Tape measure and long spirit level
- String line and pegs
- Spade or post hole digger
- Drill driver and saw
- Clamps and two stepladders
- Cable detector
- Gloves and eye protection
How Long It Takes
Two people can build a 3.0m kit on level soil in around a day of working time. Setting the posts on day one and fitting the frame on day two gives the postcrete time to set and leaves room for stony ground or a slope.
How to Build a Pergola from a Kit Step by Step
Keep the assembly guide to hand throughout for post spacing and the fixing for each joint. The steps below add the practical detail that tends to catch people out.
1. Check Every Part Before You Dig
Lay the parts out and count them against the parts list. Missing or damaged pieces are far easier to sort before any posts go in. If the build won’t start for a few days, storing timber properly flat on bearers and under cover stops the rafters bowing.
2. Mark Out and Square Up the Footprint
Knock in a peg at each corner using the post centre measurements from the guide and run string lines between them. Measure both diagonals, and if the figures match, the layout is square. For a single corner, the 3-4-5 method works too: 600mm along one string and 800mm along the other should be 1m apart.
3. Dig the Post Holes
Run a cable detector over each position before breaking ground. Dig to the depth in the assembly guide with straight sides, leaving a clear gap around the post on every side.
Add around 75mm of gravel to the bottom of each hole for drainage and dig that bit deeper to allow for it. The kit supplies two bags of postcrete per post, so pick up an extra bag if any hole ends up oversized.
4. Set the Posts in Postcrete
The height of the notches matters more than the height of the post tops, since the beams sit in them.
- Face each notch in the direction shown in the guide
- Set the first post, then bring every other notch base to the same height with a string line or long level on a straight length of timber
- On sloping ground, level the notches and let hole depth take up the difference
- Brace each post in two directions with scrap timber and check it’s plumb on two faces
- Add water and postcrete as the bag directs, then check plumb again straight away
Postcrete firms up within minutes, so work on one post at a time with your level ready. Follow the bag’s guidance on load times, and in cold or damp weather leave the posts overnight before the beams go on.
5. Drop the Beams into the Notches
Lift each beam into its notches with one person on each stepladder and clamp it before fixing. Check it’s level along the length and sits level with the opposite beam. Small gaps in a notch are easier to pack now than later. Fix the beams through into the posts with the screws the guide lists.
6. Fix the Rafters
Mark rafter positions in pencil along both beams so the spacing matches. Lay the rafters with the bevel cut ends facing out and an equal overhang each side. Fix the two outer rafters first and recheck the diagonals, as a frame slightly out of square is easy to push back into line before the rest go on.
7. Add the Infill and Braces
The 47 x 75mm infill fits between the rafters to hold the spacing and stop them twisting as they dry. Fit it as shown in the guide, checking the rafters stay parallel.
The brace length is cut into knee braces with 45 degree ends, fixed between each post and the timber above. Braces stop the frame racking, which is the sideways lean an open structure picks up in strong wind. Cut and offer up one brace first, then use it as a template for the rest.
8. Seal Cut Ends and Check for Movement
Pressure treatment doesn’t always reach the centre of a thick section, so brush end grain preservative onto every cut. There’s more on this in the guide to types of timber treatments.
Once the preservative is on, push firmly on each corner of the frame. Any fixings that have moved can be re-tightened before the temporary bracing comes off.
Common Mistakes When Building a Pergola
|
Mistake |
What goes wrong | How to avoid it |
|
Levelling post tops instead of notches |
Rafters won’t lie flat |
Level from notch base to notch base |
| Removing braces too early | Posts lean before the postcrete has set |
Leave braces on overnight |
| Skipping preservative on cuts | Rot tends to start at cut ends |
Treat each cut as you make it |
|
Fixing post shoes into slabs on sand |
Fixings pull out |
Dig through or fix to concrete |
|
Ignoring a slope |
One side sits visibly lower |
Level the notches and vary hole depth |
| Building too tall near a boundary | Falls outside permitted development |
Stay under 2.5m within 2m of a boundary |
Looking After a Timber Pergola
A yearly check keeps small problems from growing.
- Tighten fixings that have worked loose over winter
- Clear debris from the tops of the beams, where water sits
- Check for soft spots where the posts meet the ground
- Cut back climbers holding damp against the timber
Surface splits in 150 x 150mm sawn posts are common, as large sections dry from the outside in and the outer layer shrinks faster than the core. They rarely affect strength, though brushing preservatives into deeper splits helps keep water out.
Treated timber starts out green and fades to brown or silver grey. If you’d like a different colour, most finishes need new treated timber to dry out for a few months first. The guide to types of finishes for timber compares outdoor options, and wood stain is available once you’ve picked a colour.
Adding Plants, Lights and Shade
- Climbing plants: fix garden trellis between the posts, bearing in mind a mature wisteria puts real weight on the rafters
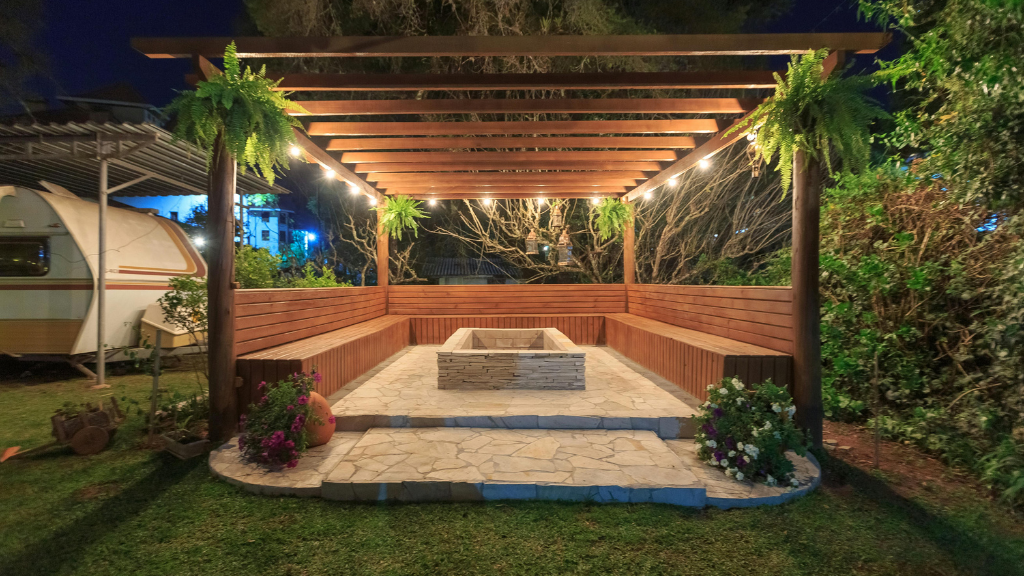
- Festoon lights: hang the cable from cup hooks screwed into the underside of the rafters
- Shade: a shade sail or fabric cover works for summer, but check planning before adding a solid roof or enclosed sides
Getting a Pergola Kit Delivered Around Scunthorpe
Skuma Timba delivers pergola kits in its own vans to addresses within 65 miles of the Scunthorpe branch, with free delivery on orders over £500 + VAT. Online orders can also be collected from the branch, where any extra timber for trellis battens or a planter can be cut to size.
Not sure which kit size suits your space? Speak to someone who knows on 01724 844441 or find out if it’s in stock online.
Frequently Asked Questions About Building a Pergola
How deep should pergola posts be set?
Follow the depth in your kit’s assembly guide, as it’s matched to the post length. For a pergola around 2.5m tall, posts are commonly set about 600mm into the ground, deeper in soft soil or on exposed sites, plus around 75mm for gravel.
Do you need planning permission for a pergola in the UK?
Most back garden pergolas in England don’t. The main limits are 2.5m high within 2m of a boundary and 3m for a flat-topped structure further away. Listed buildings, flats and conservation areas have tighter rules, and Scotland and Wales work differently.
Can you build a pergola on a patio?
Yes, either by lifting the slabs and setting the posts in the ground below or by fixing bolt-down post shoes to a concrete base. Paving laid on sand won’t give fixings enough grip to hold the frame in the wind.
How long should the postcrete set before fitting the beams?
Load times vary between products, so check the bag. Postcrete firms up within minutes, but posts usually need a few hours before taking weight. In cold or damp weather, leave them overnight with the braces still on.
How much does it cost to build a pergola?
Heavy duty timber pergola kits start from around £450 + VAT for a 2.4m x 2.4m size. Budget extra for gravel, preservative, post shoes on concrete and any tools you need to buy or hire.