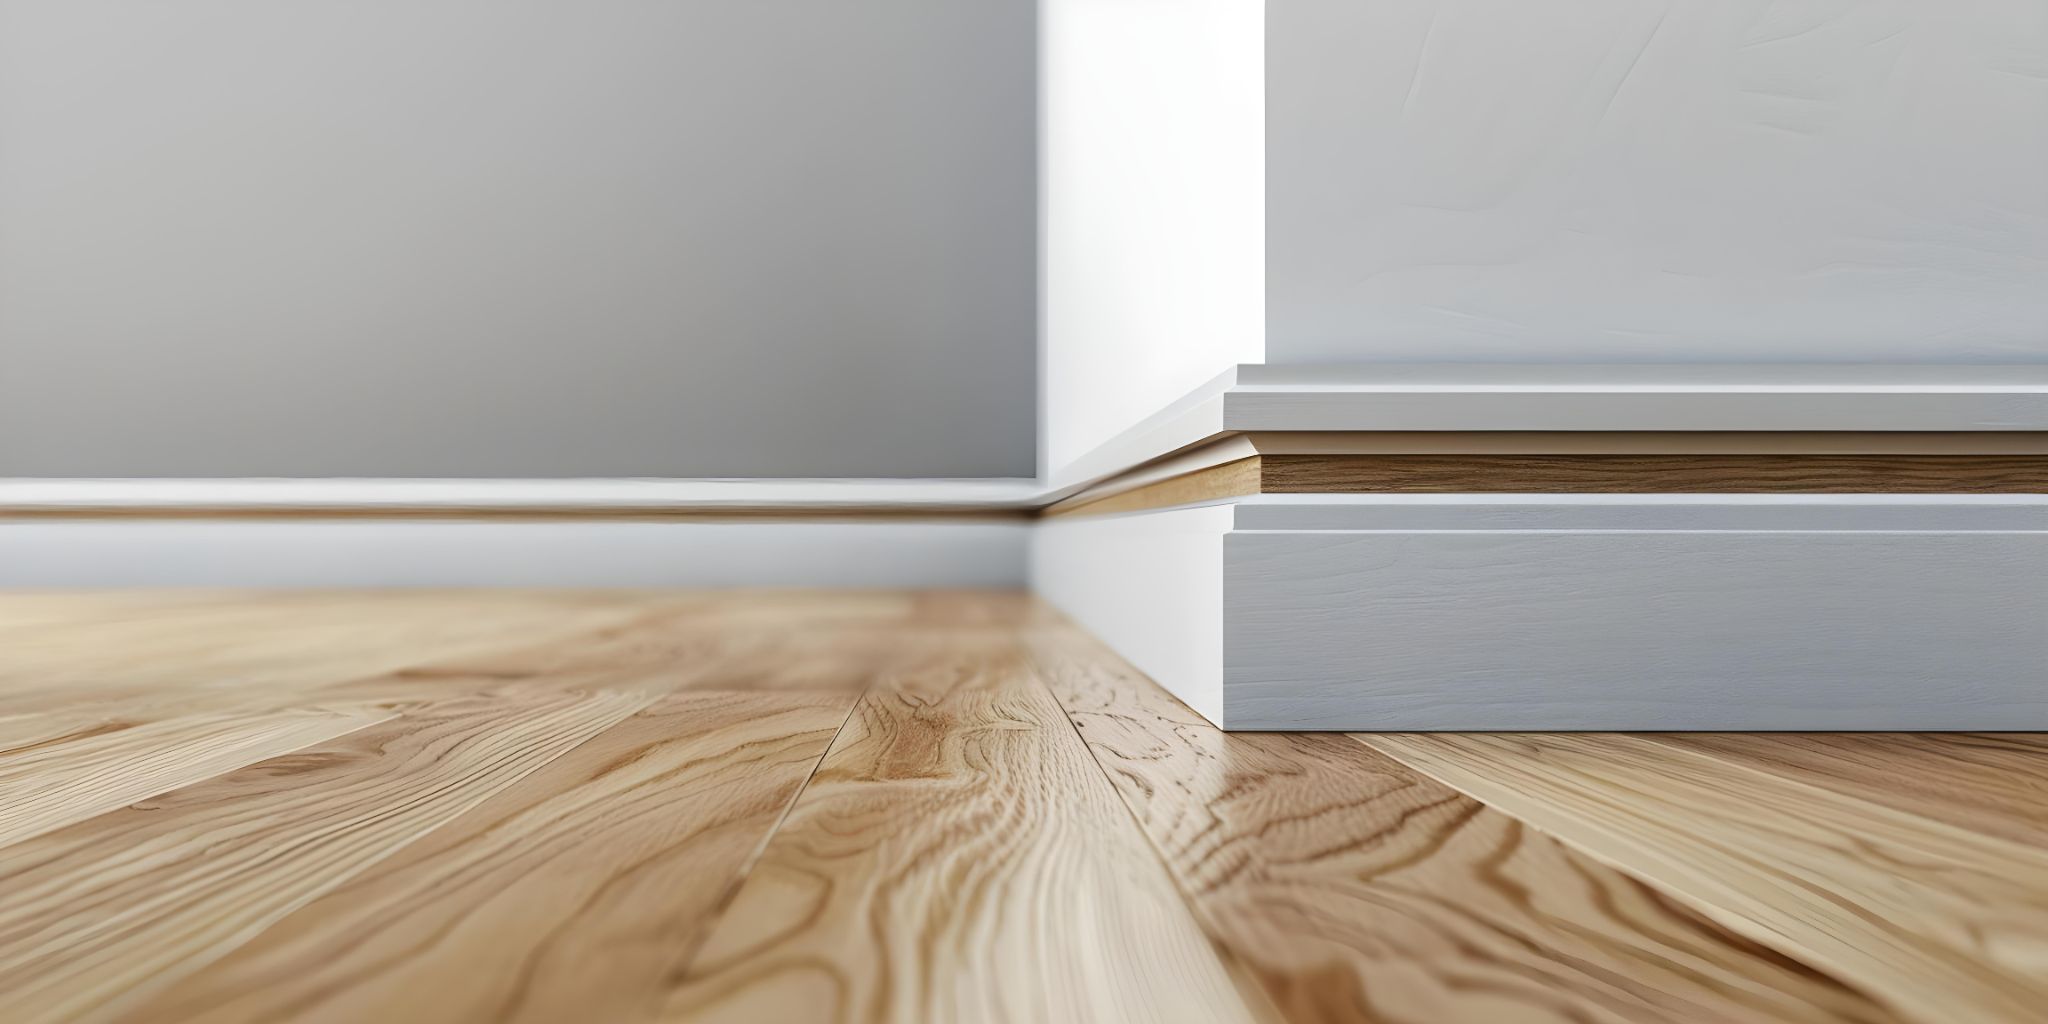

Cutting is the part of fitting skirting that catches most people out. The boards themselves are cheap and the fixing is simple, but a gappy corner or a board cut a few millimetres short will spoil the look of an otherwise tidy room. The good news is that the room tells you which cut to make, and a sharp blade matters far more than expensive kit. This guide walks through every cut you’ll need, including the ones the usual how-to pages skip, like cutting a board in situ or on the wall.
What you’ll need before you cut
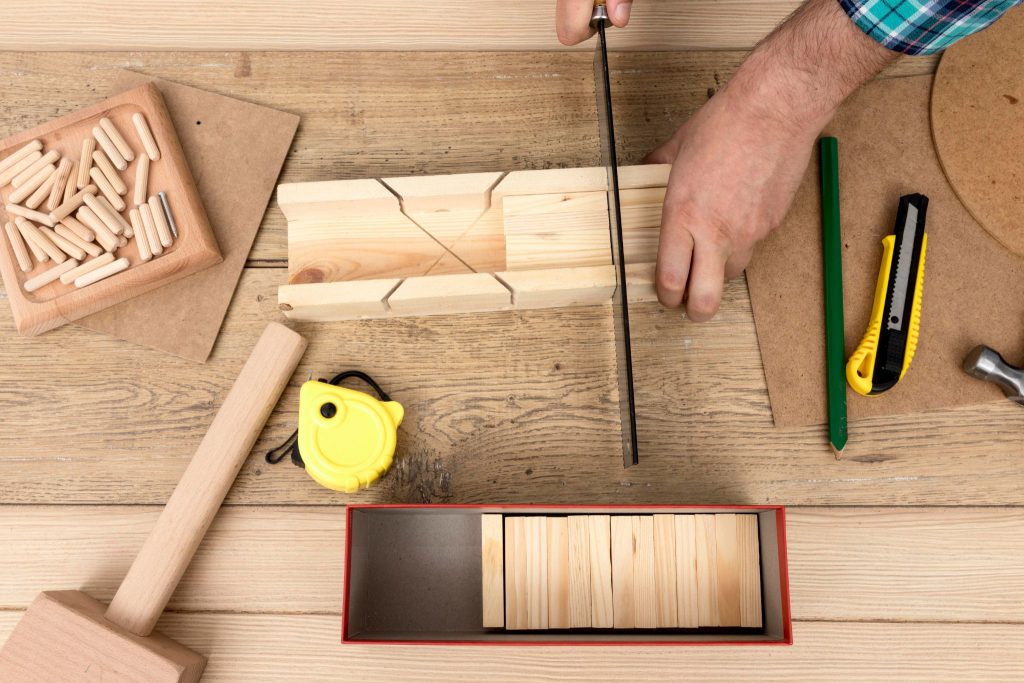
You don’t need a workshop full of tools to fit skirting in one room. Here’s the working kit:
- Mitre saw, or a mitre box and a fine-tooth hand saw if you’re on a budget
- Coping saw for scribing internal corners
- Tape measure and a sharp pencil
- Combination square for marking square ends and checking angles
- A spare offcut to test cuts before you commit to the real board
- Jigsaw or multi-tool if you’re cutting in situ or scribing to a floor
One point worth knowing before you start: MDF, softwood and hardwood all cut a little differently. MDF chips and furs up at the edges if your blade is blunt or coarse, so use a blade with as many teeth as you can. Softwoods like redwood and pine cut easily but can splinter on the back face, so smooth planed timber sections tend to give the cleanest cut edges. Hardwoods such as oak are slower going and dull a blade quicker, so a fresh blade is worth it.
Measuring is where most mistakes happen. Measure twice and cut once, and always cut a fraction long. You can shave a board down, but you can’t add length back if a joint adjustment leaves you short.
Understanding the cuts: which joint goes where
The shape of the room decides the cut, not your preference. Get this part right and the cutting itself becomes straightforward.
|
Situation |
Joint to use | The cut |
|
Internal corner |
Scribed joint (or mitre) |
First board cut square, second scribed to its profile |
|
External corner |
Mitre joint |
Both boards cut at 45 degrees |
|
Joining along a long wall |
Scarf or headed mitre joint |
Both pieces cut at opposing 45 degrees |
| End against a door lining | Square cut |
Straight 90 degree cut |
On external corners, a mitre is the right call. Two boards meet at a clean point with no cut ends on show. On internal corners you have a choice, and in most UK homes scribing is the better one. Walls are rarely perfectly square, especially in older properties, and a mitred internal corner will gap as soon as the angle is even slightly off. A scribed joint follows the profile of the first board, so it stays tight even when the corner isn’t a true 90 degrees.
How to cut 45 degree angles in skirting board
The mitre is the cut you’ll use on every external corner and along long walls. Here’s the method:
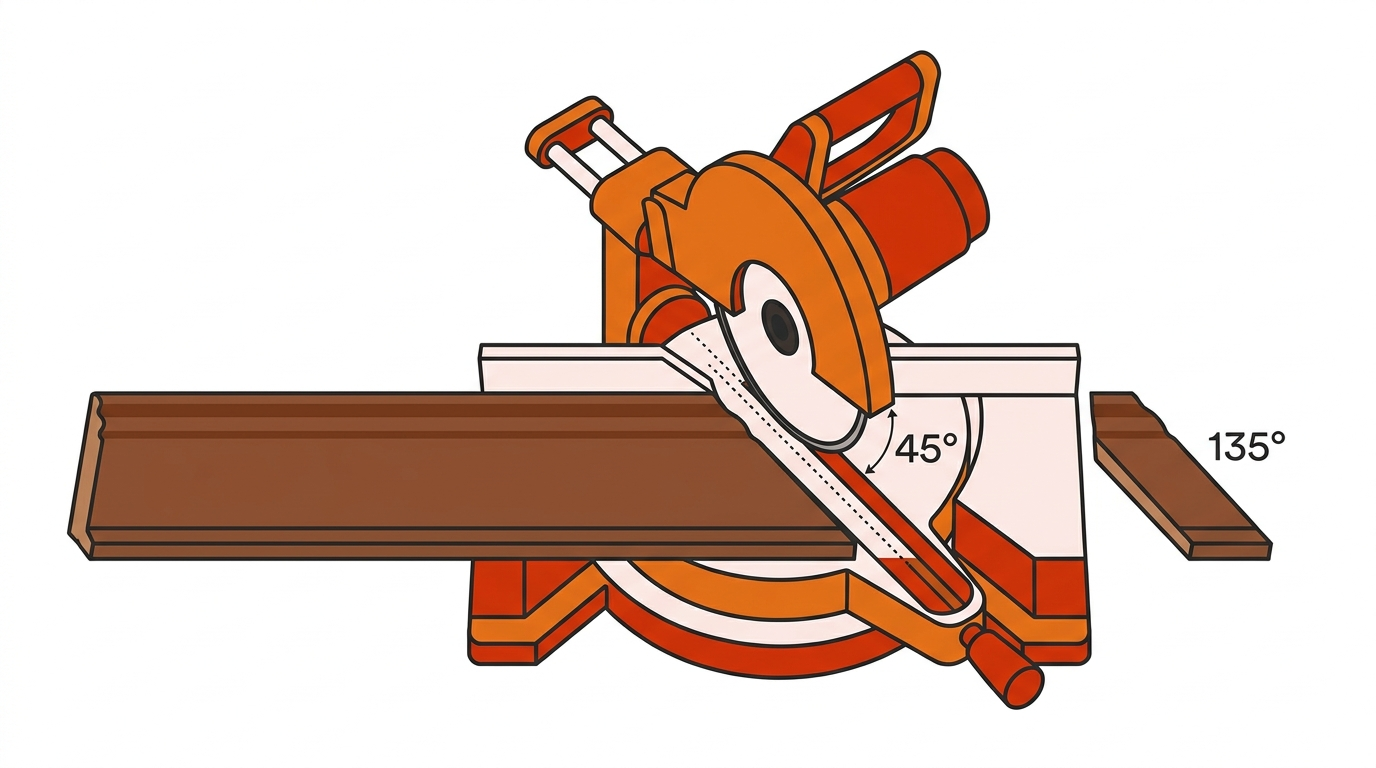
- Lay the board flat on the saw bed with the face (the decorative side) pointing up.
- Set the mitre saw to 45 degrees.
- Work out which way the angle needs to fall. For an external corner, the cut runs so the face of the board is the longest point and the back is the shortest.
- Make the cut in one steady pass. Let the blade do the work rather than forcing it, which reduces chipping.
A single 45-degree cut actually gives you two usable pieces. One end comes off at 45 degrees, and the matching offcut sits at 135 degrees. Keep that offcut. The 135-degree piece is often exactly what you need for the next corner or join, which saves a board and a cut later on.
How to cut a scribed internal corner
Scribing looks fiddly the first time, but it gives a far tighter internal corner than a mitre and only one board needs the awkward cut.
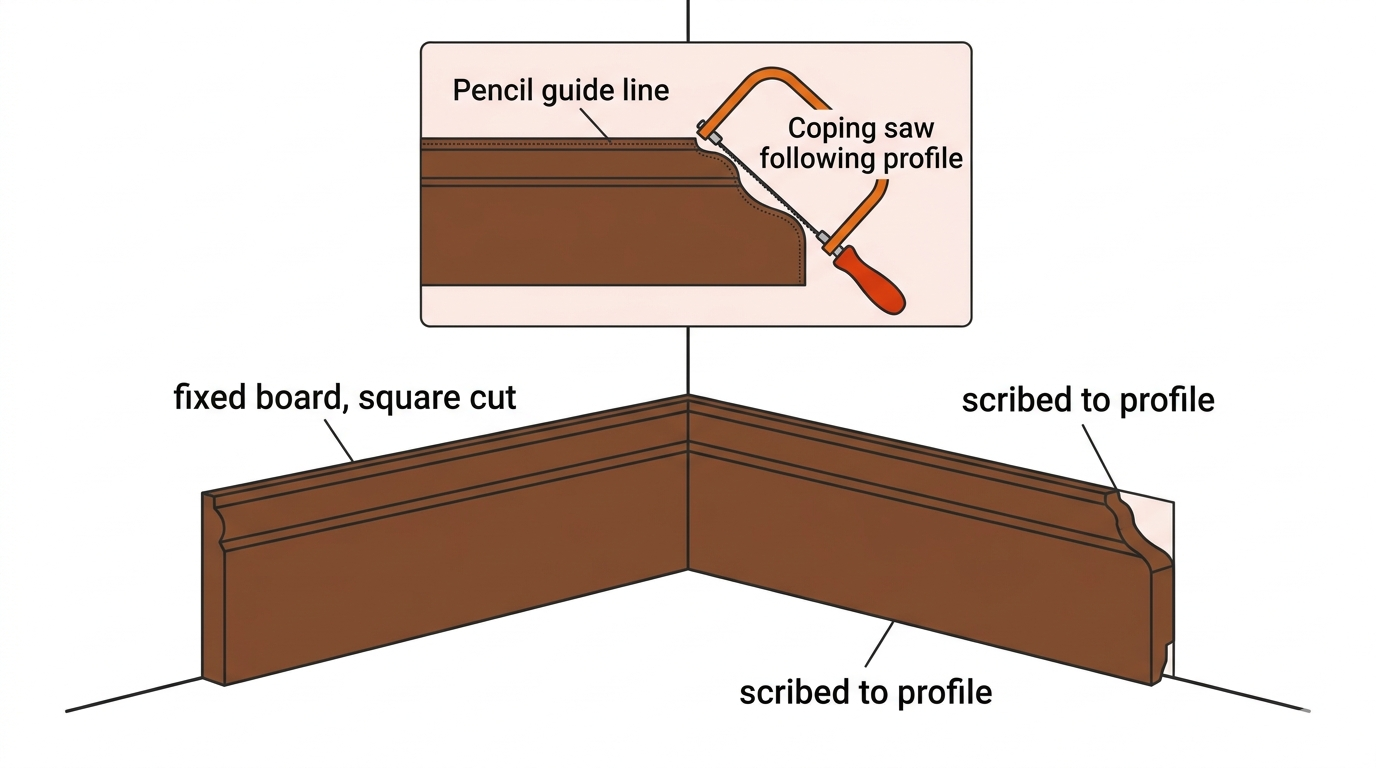
- Fix the first board into the corner with its end cut square, hard against the adjoining wall.
- Take the second board and cut a 45-degree mitre on the end that meets the corner. This exposes the profile shape on the cut face.
- Run a pencil along that exposed profile line so you can see exactly what you’re cutting to.
- Cut along the pencil line with a coping saw, following the contour of the moulding.
- Undercut slightly, angling the saw so the back is cut away more than the front. This lets the front edge sit tight against the fixed board.
Test the fit against an offcut before you cut the real corner. The first scribe is always the hardest, and a practice run on a spare piece saves a wasted length.
How to cut a skirting board in situ
Most cutting is best done on a bench where you can clamp the board and use the mitre saw properly. There are times, though, when you need to cut a board once it’s already positioned. Cutting in situ is for fitting adjustments, not for fine angle work.
You’d cut in situ when:
- Trimming a board to final length once it’s been dry-fitted in place
- Scribing the bottom edge to follow an uneven floor
- Notching around a pipe, cable or fixing that sits in the way
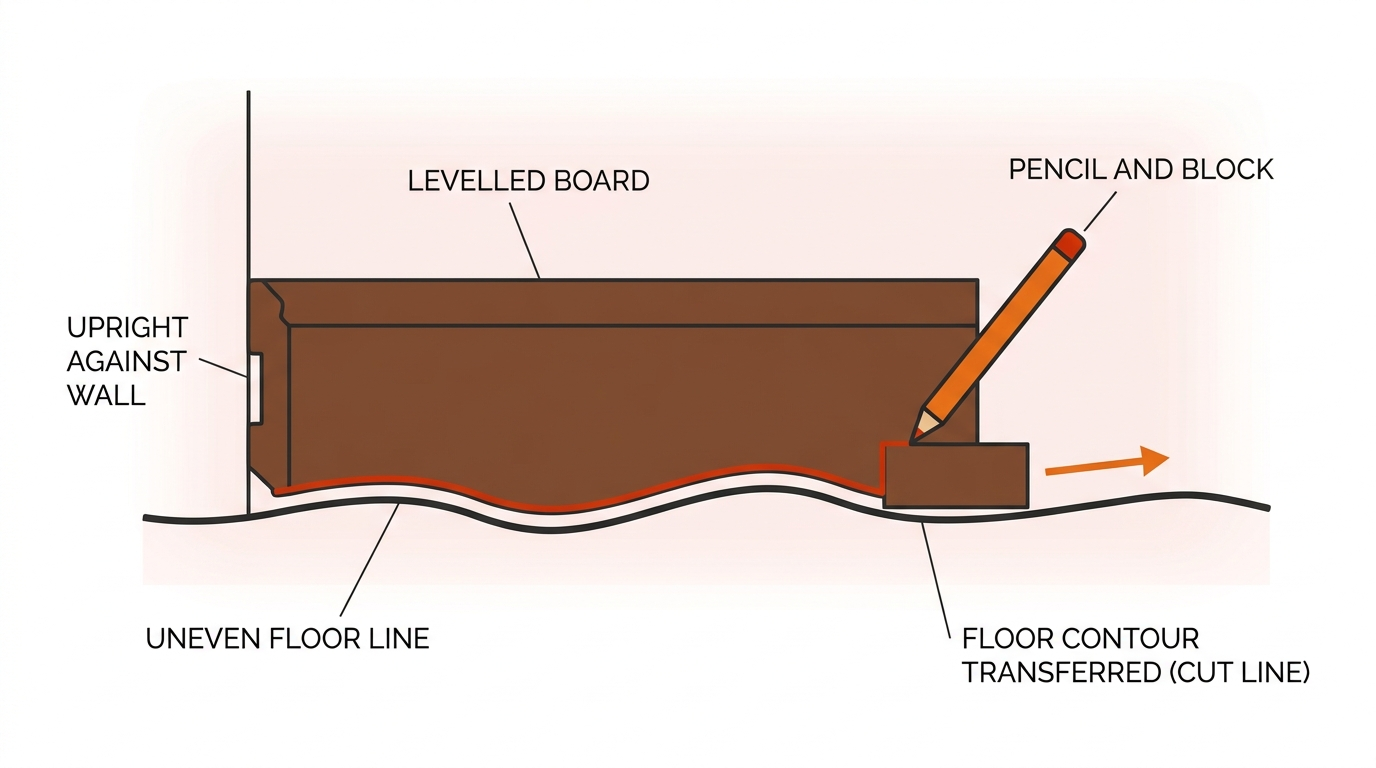
Scribing to an uneven floor is the most common reason. The method:
- Set the board against the wall and level it, packing the underside if needed.
- Hold a small block with a pencil resting on top, then run the block along the floor.
- The pencil transfers the floor’s contour onto the board as a cutting line.
- Cut to that line with a jigsaw or coping saw, then drop the board down so it follows the floor with no gaps.
Clamp the board wherever you can and support any offcut so it doesn’t snap off and tear the run as you finish the cut. Keep in mind that any angle cut for a corner is still better done on the mitre saw. In situ is for getting a board to sit right, not for the precision joints.
How to cut a skirting board on the wall without removing it
Sometimes you need to cut a board that’s already fixed and you don’t want to pull the whole length off. Two common cases:
- Cutting back a section to fit a new radiator pipe or socket
- Removing a damaged piece to splice in a fresh length
The method:
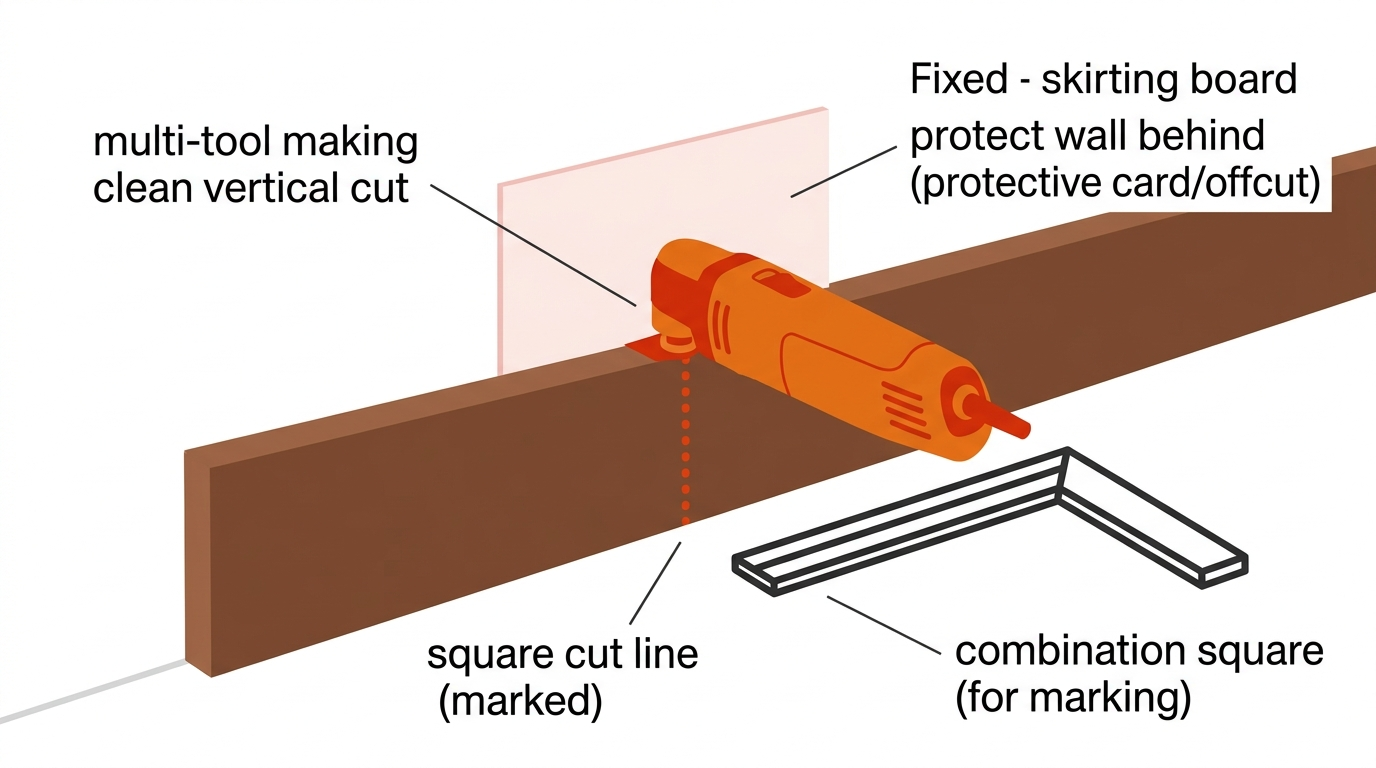
- Mark the vertical cut line with a combination square so the cut is dead straight.
- Use a multi-tool with a plunge blade, or a flush-cut pull saw, for the vertical cut. Both let you cut cleanly without much clearance.
- Protect the wall and floor behind the board with an offcut or a scrap of card so the blade doesn’t mark them.
If the section you need to remove is large, or the board is brittle MDF that might break up, it’s usually quicker to take the whole length off, cut it on the bench and refit it.
Fixing the board once it’s cut
With the cutting done, fixing is the easy part:
- On masonry walls, grab adhesive holds well and avoids drilling. Run a zigzag bead along the back and press the board firmly into place.
- For a stronger hold>, or on stud walls, screw through into the studs or use wall plugs. Countersink the screws so the heads sit below the surface, then fill over them.
- Close any gaps with decorator’s caulk along the top edge where the board meets the wall, and wood filler on joints and screw holes. Sand flush once dry.
What does skirting board installation cost?
Cost comes down to the board material, the size of the job and whether you’re fitting it yourself or bringing in a joiner. As a rough guide for the UK:
-
- MDF skirting is the cheapest, often a few pounds per metre. It paints up well and is fine for most interior rooms.
- Softwood (redwood or pine) sits a little above MDF and suits a painted or stained finish.
- Hardwood like oak costs noticeably more per metre and is usually chosen where the timber is on show rather than painted.
- A joiner’s labour is commonly charged at a day rate, and a straightforward room can often be fitted within a day. Awkward layouts with lots of corners take longer.
You’ll also see suppliers quote supply-only or supply-and-fit. Supply-only is cheaper if you’re confident with the cutting. Supply-and-fit costs more but takes the corners and the mess off your plate.=
On the DIY-versus-pro question, be honest with yourself about the room. A square room with a couple of straightforward corners is well within reach for a careful DIYer. A room with several external corners, ornate moulded profiles, or hardwood boards is where most people are better off calling a joiner. Getting boards cut to size before they arrive takes a lot of the difficulty out of it. Skuma Timba can cut skirting to length in branch and deliver it ready to fit, which saves the trickiest measuring and a good deal of sawdust on the day.
Common mistakes to avoid
The errors that catch people out most often:
- Cutting too short. Always cut a touch long and trim down.
- Mitring internal corners on out-of-square walls. Scribe these instead for a tight fit.
- A blunt or coarse blade on MDF. It furs and chips the edge. Use a fine-tooth blade.
- Ignoring floor level. An uneven floor needs the board scribed along the bottom, not forced down.
- Gluing before dry-fitting. Always test the board in place first, then fix it.
- Forgetting the offcut. That 135 degree piece often does the next corner for free.